
Pressure King Pro Instruction Manual: A Comprehensive Guide
This manual details safe operation, component identification, and troubleshooting for your Pressure King Pro. Follow instructions carefully to maximize performance and longevity.
Understanding Your Pressure King Pro
Your Pressure King Pro is a versatile multi-cooker designed for convenience and efficiency. This appliance combines multiple cooking methods – pressure cooking, slow cooking, sautéing, steaming, and yogurt making – into one unit. Familiarize yourself with its capabilities to unlock a world of culinary possibilities.
Proper use, guided by this manual, ensures safe and optimal performance. Understanding each function and safety precaution is crucial for preventing accidents and achieving delicious results. Always refer to the detailed instructions provided within.

Safety Precautions
Safety is paramount when operating your Pressure King Pro. Never touch hot surfaces during or immediately after cooking. Always unplug the appliance when not in use and before cleaning. Ensure the lid is securely locked before pressurizing.
Do not attempt to force open the lid while pressure remains inside. This manual provides critical safeguards; neglecting them could lead to injury or damage. Only qualified personnel should perform maintenance on electrical components.
Important Safety Warnings
Caution! Hot steam and contents can cause burns. Never direct steam towards yourself or others. Do not immerse the main unit in water. Always ensure the pressure release valve is clear of obstructions.
Never operate the Pressure King Pro without sufficient liquid. Misuse can result in scalding or appliance malfunction. Read this manual thoroughly before first use to prevent accidents and ensure safe operation.
Electrical Safety Guidelines
Important: Always unplug the Pressure King Pro when not in use and before cleaning. Do not operate with a damaged cord or plug. Avoid using extension cords. Ensure the voltage matches your household supply.
Never attempt to repair the appliance yourself; contact qualified personnel for servicing. Keep the cord away from hot surfaces. Electrical hazards can cause serious injury – follow these guidelines diligently for safe operation.
Components and Parts Identification
Familiarize yourself with the Pressure King Pro’s parts: the main unit housing the heating element, the secure-locking lid with a sealing ring for airtight closure, and the removable inner pot.
Accessories may include a steam rack and measuring cup. Proper identification ensures correct assembly and operation. Refer to diagrams within this manual for visual guidance on each component’s location and function.
Main Unit Overview
The Pressure King Pro’s main unit houses the electrical heating element and control panel. It features a robust outer casing for durability and stability during operation. The control panel includes buttons for selecting cooking modes – pressure cook, slow cook, sauté – and adjusting settings.
Ensure the unit is placed on a stable, heat-resistant surface. Proper ventilation around the unit is crucial for safe and efficient performance.
Lid and Sealing Ring
The Pressure King Pro lid is engineered for a secure, airtight seal, essential for pressure cooking. A silicone sealing ring creates this seal, preventing steam leaks. Regularly inspect the sealing ring for cracks or damage; replacement is crucial for maintaining pressure.
Proper lid alignment is vital – ensure it clicks securely into place before operation. Never force the lid open while pressure remains inside.
Inner Pot and Accessories
Your Pressure King Pro includes a durable inner pot, designed for even heat distribution. Accessories may vary by model, potentially including steaming racks or specialized cooking baskets. Always ensure the inner pot is correctly seated within the main unit before use.
Refer to your specific model’s documentation for a complete list of included accessories and their intended functions. Handle the inner pot with care to avoid damage.
Getting Started: Initial Setup
Before your first use, thoroughly inspect all components for any shipping damage. Remove all packaging materials, including any inside the inner pot. Wash the inner pot, lid, and any accessories with warm, soapy water, then rinse and dry completely. Familiarize yourself with the lid locking mechanism and sealing ring placement.
Ensure proper setup for optimal and safe operation of your Pressure King Pro.
First-Time Use Instructions
To begin, add approximately 1 cup of water to the inner pot; Secure the lid, ensuring the sealing ring is correctly positioned. Perform a “water test” to verify proper sealing and function. Select the ‘Pressure Cook’ mode on low pressure for 5 minutes. Allow a natural pressure release after the cycle completes.
This initial run confirms everything is working as intended before cooking food.
Testing the Pressure Release Valve
Before first use, verify the pressure release valve functions correctly. Gently move the valve to the ‘Venting’ position – steam should release freely. Return it to the ‘Sealing’ position. Ensure no obstructions are present. This test confirms safe pressure regulation during operation.
Regularly check for debris and ensure smooth movement of the valve for optimal safety and performance. A blocked valve can be dangerous.
Operating Instructions: Basic Functions
The Pressure King Pro offers versatile cooking modes. For pressure cooking, select the desired pressure level and time. The slow cooking function provides low, consistent heat for tender results. Utilize the sauté/browning function to sear meats or build flavor before pressure or slow cooking.
Always ensure the lid is securely locked before initiating any cooking cycle; Refer to the water levels section for appropriate liquid amounts.
Pressure Cooking Mode
To utilize pressure cooking, securely close and lock the lid. Select “Pressure Cook” and choose your desired pressure level – low or high. Input the cooking time based on your recipe and food type. The Pressure King Pro will automatically build pressure before beginning the timed cook.
Once complete, allow for natural pressure release or carefully use the quick release valve, following safety guidelines.
Slow Cooking Mode
The Slow Cook function offers low, medium, and high heat settings for extended, flavorful cooking. Select “Slow Cook” and your preferred heat level. This mode is ideal for tenderizing tougher cuts of meat or simmering soups and stews. Ensure the lid is securely in place during slow cooking.
Cooking times will vary depending on the chosen heat setting and recipe; consult your recipe for guidance.
Sauté/Browning Function
The Sauté/Browning function allows you to sear meats and vegetables directly in the inner pot before pressure or slow cooking, building rich flavors. Select “Sauté” and allow the pot to heat up. Add oil, then your ingredients.
Stir frequently to prevent burning. Exercise caution as the pot will become hot during this process. Remember to deglaze the pot after browning for optimal results.
Advanced Cooking Functions
Your Pressure King Pro offers versatile functions beyond basic pressure cooking. Explore the Steam function for perfectly cooked vegetables and seafood. Utilize the Yogurt Making mode for homemade, probiotic-rich yogurt.
The Keep Warm function automatically activates after cooking, maintaining food temperature until you’re ready to serve. These advanced features expand your culinary possibilities, offering convenience and delicious results.
Steam Function
The Steam function utilizes the Pressure King Pro’s pressure to quickly and efficiently steam foods. Add water to the inner pot, place the steaming rack inside, and arrange your vegetables, fish, or dumplings on top.
Select the Steam function and adjust the time accordingly. Steaming preserves nutrients and creates tender, flavorful results. Ensure sufficient water levels to prevent burning and enjoy healthy, delicious meals.
Yogurt Making Mode
The Pressure King Pro simplifies homemade yogurt creation with its dedicated Yogurt Making Mode. Combine milk and yogurt starter culture in the inner pot, select the Yogurt function, and adjust the fermentation time.
This mode maintains a consistent temperature ideal for bacterial growth, resulting in creamy, probiotic-rich yogurt. Allow cooling before refrigerating to stop fermentation and achieve desired thickness. Enjoy fresh, customized yogurt!
Keep Warm Function
The Pressure King Pro’s Keep Warm function automatically activates after pressure cooking or slow cooking cycles conclude. This feature maintains food at an optimal serving temperature for up to several hours, preventing spoilage and ensuring meals are ready when you are.
It’s perfect for busy schedules! However, avoid prolonged use for delicate foods, as continued warming may alter texture.
Understanding Pressure Levels
The Pressure King Pro offers adjustable pressure settings to suit various recipes. Low pressure is ideal for delicate foods like vegetables and fish, preserving their texture and nutrients. High pressure significantly reduces cooking times for tougher cuts of meat, beans, and grains.
Selecting the correct pressure level is crucial for optimal results; consult your recipes for guidance.
Low Pressure Settings
Utilizing low pressure on your Pressure King Pro is perfect for sensitive ingredients. This setting gently cooks foods like delicate fish, poultry, and easily-overcooked vegetables, retaining their shape and vital nutrients. It’s also excellent for simmering soups and stews without vigorous boiling.
Low pressure generally requires slightly longer cooking times compared to high pressure.
High Pressure Settings
High pressure significantly reduces cooking times for tougher foods like meats, beans, and root vegetables. This setting achieves higher temperatures, breaking down fibers quickly and resulting in tender, flavorful dishes. Always adhere to recommended cooking times to prevent overcooking.
Ensure sufficient liquid is present when using high pressure for optimal results and safe operation of your Pressure King Pro.
Water Levels and Cooking Times
Maintaining correct water levels is crucial for safe and effective Pressure King Pro operation. Insufficient liquid can cause burning, while excessive liquid may affect cooking results. Always observe the minimum and maximum fill lines indicated within the inner pot.
Adjust cooking times based on food type and quantity; refer to recipe guidelines for precise durations.
Minimum and Maximum Water Levels
The Pressure King Pro requires a minimum liquid volume to generate steam and build pressure – typically at least 1 cup (240ml). Never operate the cooker dry! The maximum fill line prevents overflow during operation; do not exceed ¾ full.
Exceeding these levels can lead to blockages in the steam release valve or potentially dangerous situations. Always check levels before each use.
Adjusting Cooking Times for Different Foods
Cooking times vary based on food type, density, and quantity. Dense foods like beans and meats require longer cooking times than vegetables. Smaller pieces cook faster than larger ones.
Refer to recipe charts for initial guidelines, but always check for doneness. You can slightly increase cooking time if needed, but avoid overcooking, which can affect texture and flavor.
Incoming Water Pressure Requirements
Optimal Pressure King Pro performance relies on adequate water pressure. The recommended range is between 2 and 6 bar (approximately 29-87 PSI). Insufficient pressure—below 2 bar—may hinder pressure build-up and cooking efficiency.

If you experience issues, check your home’s water pressure. Low pressure might necessitate adjustments or the use of a pressure booster. Always ensure a consistent water supply during operation.
Optimal Water Pressure Range (2-6 bar)
For peak Pressure King Pro functionality, maintain incoming cold water pressure between 2 and 6 bar. This range ensures efficient pressure build-up and consistent cooking results. Pressures below 2 bar may cause prolonged preheating or prevent reaching desired pressure levels.
Conversely, exceeding 6 bar isn’t typically detrimental but isn’t necessary for optimal operation. Regularly check your water pressure to guarantee consistent performance.
Troubleshooting Low Water Pressure Issues
If your Pressure King Pro struggles to build pressure, verify your incoming water supply. Low pressure (<2 bar) is a common cause. Check if other faucets experience similar issues, indicating a broader plumbing problem.
Consider contacting a plumber to assess and rectify the low pressure. Ensure no valves are partially closed. If the issue persists, contact customer support for further assistance and potential solutions specific to your model.
Cleaning and Maintenance
Regular cleaning ensures optimal Pressure King Pro performance and longevity. Always unplug the unit before cleaning. The inner pot is dishwasher-safe, or can be washed with warm, soapy water. The lid and sealing ring require careful handwashing to avoid damage.
Inspect the sealing ring for cracks or wear, replacing it when necessary. Avoid abrasive cleaners, which can harm the non-stick coating. Thoroughly dry all components before reassembly.
Cleaning the Inner Pot
The Pressure King Pro’s inner pot is designed for easy cleaning. It’s dishwasher safe for convenient cleanup, saving you time and effort. Alternatively, wash it by hand with warm, soapy water and a non-abrasive sponge. Avoid steel wool or harsh scouring pads, as these can damage the non-stick coating.
Ensure the pot is completely dry before placing it back into the main unit to prevent any issues during operation.
Cleaning the Lid and Sealing Ring
After each use, carefully clean the Pressure King Pro lid with warm, soapy water. The sealing ring requires special attention; remove it and wash it separately. Inspect for cracks or damage and replace if necessary. Avoid abrasive cleaners on the sealing ring.
Ensure both the lid and sealing ring are thoroughly dry before reassembling. Proper cleaning maintains optimal sealing performance.
Troubleshooting Common Issues
If your Pressure King Pro isn’t building pressure, check the sealing ring and ensure the lid is securely locked. Food burning often indicates insufficient liquid or too high a heat setting. Always adhere to minimum liquid requirements.
Refer to the manual for specific error codes and solutions. Never attempt to force open the lid while pressure remains inside – use the release valve!
Pressure Not Building Up
If the Pressure King Pro fails to pressurize, first verify the lid is correctly sealed and locked into position. Inspect the sealing ring for damage or improper placement; a faulty ring prevents a tight seal. Ensure the pressure release valve is set to ‘Sealing’.
Insufficient liquid can also cause this issue. Confirm adequate water levels as per recipe guidelines.

Food Burning on the Bottom
If food scorches during pressure cooking, ensure sufficient liquid is present in the inner pot. Thick sauces or starchy foods are prone to sticking; consider deglazing the pot after sautéing to loosen browned bits.
Avoid overfilling – exceeding maximum capacity can lead to uneven heating and burning. Reduce cooking time slightly for sensitive ingredients and stir occasionally if possible.
Replacing Parts
Maintaining your Pressure King Pro involves periodic part replacement. The sealing ring should be replaced every 12-18 months, or sooner if it loses elasticity. A worn pressure release valve compromises safety; replace it immediately if damaged or malfunctioning.
Only use genuine Pressure King Pro replacement parts to ensure compatibility and continued safe operation. Refer to the warranty information for potential coverage.
Sealing Ring Replacement
To replace the sealing ring, ensure the Pressure King Pro is cool and depressurized. Carefully remove the old ring from the lid. Clean the lid groove thoroughly before installing the new ring, ensuring it sits flush and evenly.
A properly seated ring is crucial for a secure seal. Inspect the new ring for any defects before use. Regular replacement maintains pressure and prevents leaks, ensuring safe and efficient cooking.
Pressure Release Valve Replacement
If the pressure release valve malfunctions, replacement is necessary for safe operation of your Pressure King Pro. Ensure the unit is completely cool and depressurized before attempting replacement. Carefully remove the old valve, noting its orientation.
Install the new valve, ensuring it’s securely fitted. A faulty valve can compromise pressure regulation; therefore, regular inspection and timely replacement are vital for continued safe use.
Warranty Information
Your Pressure King Pro is covered by a warranty against defects in materials and workmanship. Warranty coverage details vary by region, typically spanning one year from the date of purchase. Retain your proof of purchase for warranty claims.
To initiate a claim, contact customer support with your purchase details and a description of the issue. Transferring ownership requires passing on this instruction manual to the new owner.
Warranty Coverage Details
The Pressure King Pro warranty covers defects in materials and workmanship under normal household use for one year. It doesn’t cover damage from misuse, accidents, or unauthorized repairs. This warranty is valid only with proof of purchase.
Specifically, it excludes normal wear and tear, and damage resulting from failure to follow instruction manual guidelines. The owner is responsible for ensuring the manual accompanies the unit upon resale.
How to Claim Warranty
To initiate a warranty claim for your Pressure King Pro, contact customer support with your proof of purchase and a detailed description of the defect. You may be asked to provide photos or return the unit for inspection.

Ensure the original instruction manual was followed. Warranty service is provided by authorized service centers only; unauthorized repairs void the warranty. Shipping costs for returns are the responsibility of the customer.

Frequently Asked Questions (FAQ)
Q: Why won’t my Pressure King Pro build pressure? A: Ensure the lid is securely locked, the sealing ring is properly installed, and the pressure release valve is in the sealing position.
Q: Can I use this for yogurt? A: Yes, the Pressure King Pro features a dedicated yogurt-making mode. Refer to the instruction manual for detailed steps and timings.
Common User Questions Answered
Q: My food is burning on the bottom! A: Ensure sufficient liquid is added, and avoid overly high heat settings. Stir occasionally during sautéing.
Q: How often should I replace the sealing ring? A: Replace the sealing ring every 12-18 months, or sooner if it becomes cracked, brittle, or retains odors. Proper maintenance extends its lifespan; Consult the manual for details.
Tips for Optimal Performance
To ensure peak performance, always verify the pressure release valve is clear before each use. Utilize the correct water levels as outlined in this manual; insufficient liquid can cause burning. Regularly inspect and clean the sealing ring for optimal sealing. Familiarize yourself with pressure levels for varied recipes.
Remember, proper operation guarantees safe and delicious results with your Pressure King Pro!
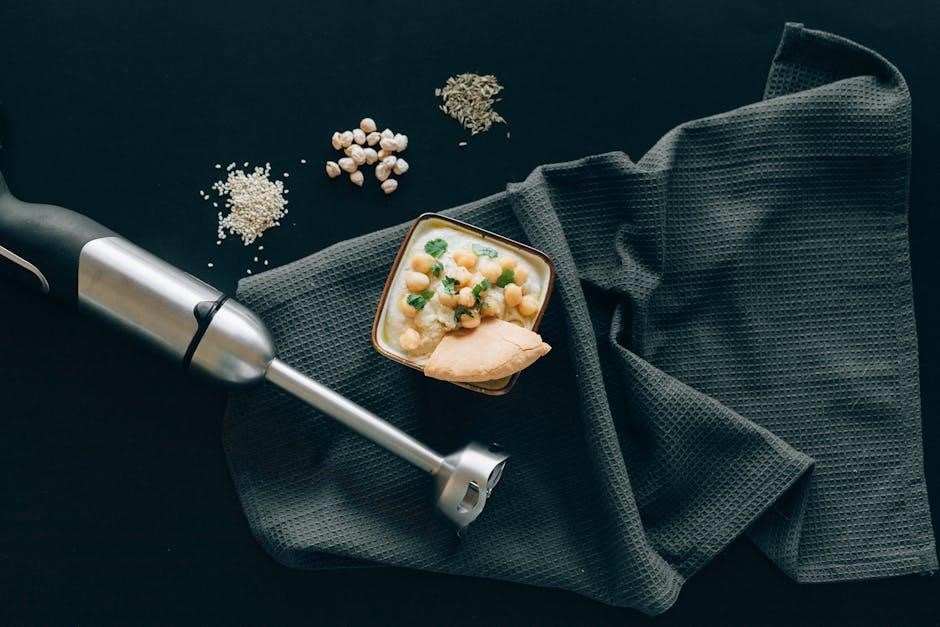
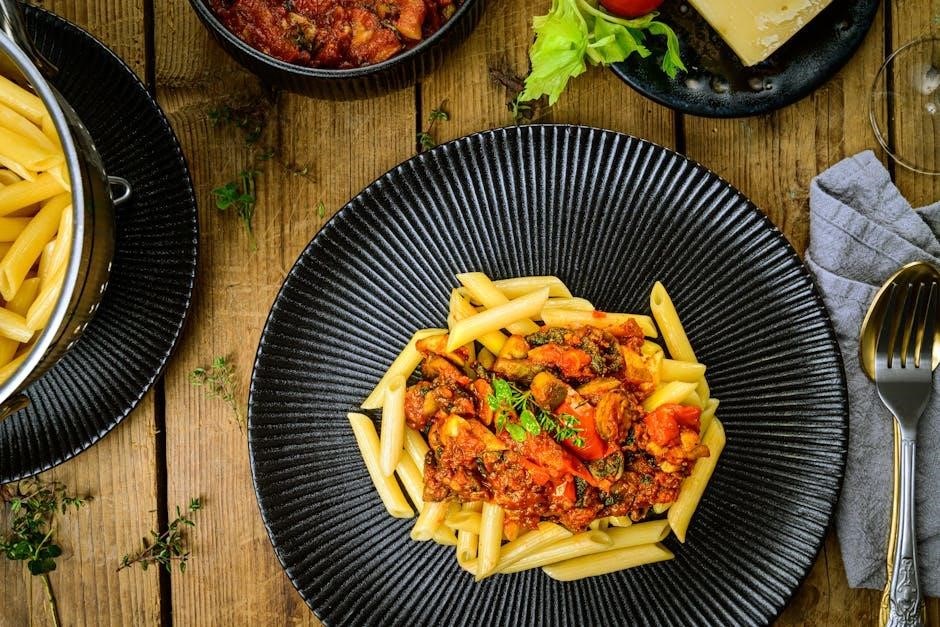
Recipe Ideas
Unlock culinary possibilities with your Pressure King Pro! Explore quick & easy pressure cooking recipes like tender pot roasts and flavorful soups. Discover slow cooking suggestions for fall-off-the-bone ribs or comforting stews. Visit drewandcole.com for video instructions and demonstrations to inspire your cooking journey.
Experiment and enjoy the versatility of your appliance!
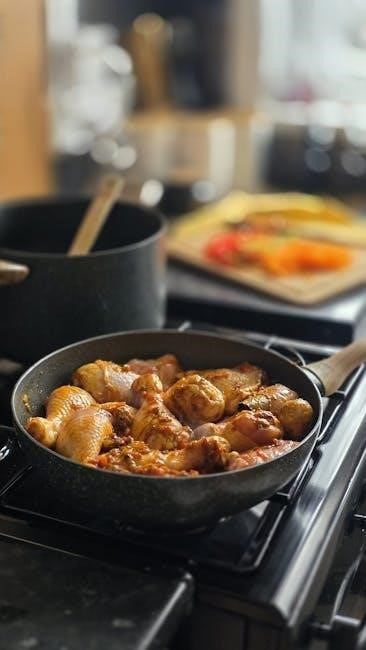
Quick & Easy Pressure Cooking Recipes
The Pressure King Pro excels at fast, flavorful meals! Try a 30-minute chicken and vegetable stew, or perfectly cooked rice in just minutes. Explore recipes for tender pulled pork, hearty chili, and creamy risotto – all achievable with minimal effort. Refer to online resources like drewandcole.com for detailed instructions and inspiration.
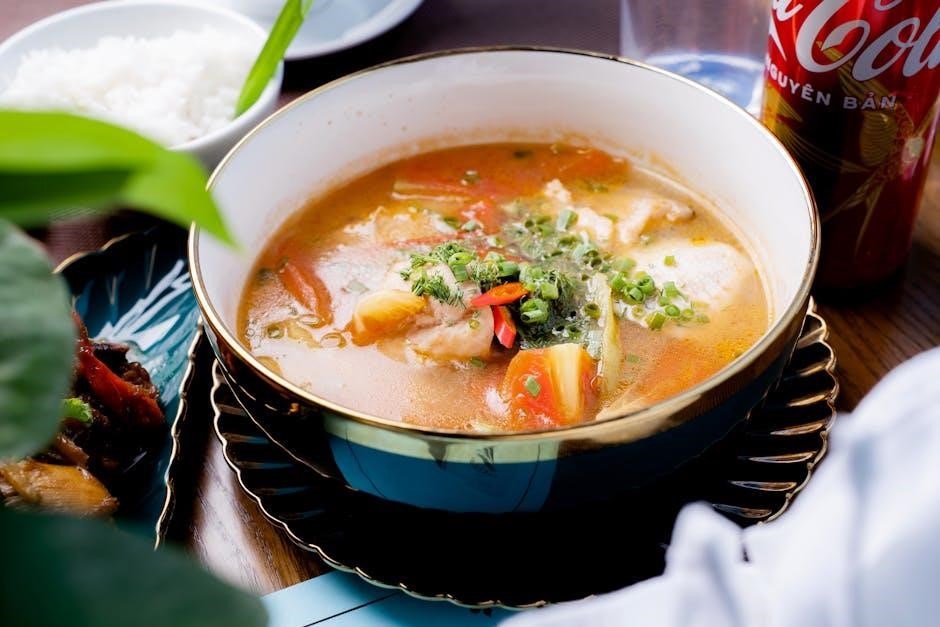
Slow Cooking Recipe Suggestions
Utilize the Pressure King Pro’s slow cooking function for effortless, tender results. Consider a classic pot roast with root vegetables, requiring minimal preparation. Explore slow-cooked curries, flavorful stews, or even decadent desserts like bread pudding. The slow cooker mode allows for all-day cooking, delivering delicious meals with unparalleled convenience. Find more ideas online!